 |
|
A couple of quick notes: First off, if any of you think that it appears that
I don't know exactly what I am doing, remember that this is the first time
I have ever used this foam. Second, I am including a considerable amount of
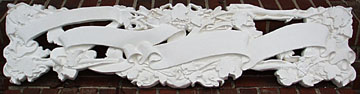
detail in the carving mostly for these pictures on the website. Future projects
using this foam will not be as intricately carved since the foam is merely
a pattern for the roughing out stage of the final wooden piece. I just
didn't want anyone to get bored looking at simple geometric shapes.
Without the detail, the almost colorless foam (a pale yellow) would
appear to be kind of a blob.
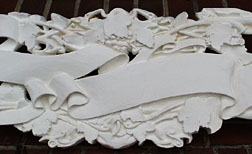
I put a coat of the primer/filler on last night. This is a very thick
(and somewhat expensive) white liquid that paints on fairly well and
does a great job of filling in the grainy texture of the carved foam.
It dries very fast and is supposed to be sandable. Since this piece is just
being used as a pattern I will not spend a lot of time and effort on
the finishing but I will definitely be using the foam for
a finished piece in the future so this is good to know.
One of the nice things about the foam is that it is waterproof and is
not affected by the weather like wood is so it may prove to be
a very useful product for future projects.
 |
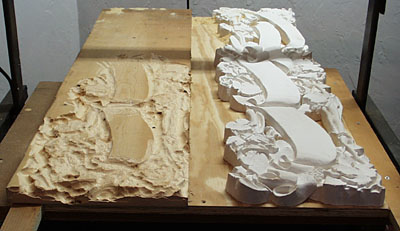
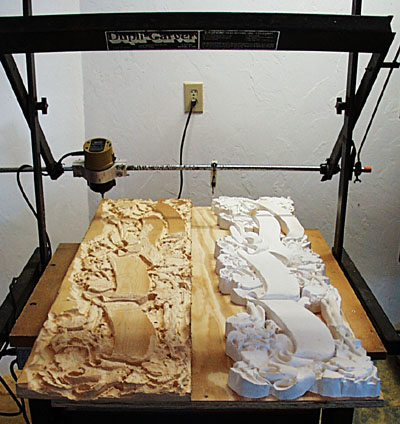
I screwed (drywall screws are the handiest tool in my shop...) the foam and the clear pine to a 2' x 4' sheet of plywood to keep them linked together during this part of the project. I put strips on the sides so the whole assembly can slide forward and backward under the tracing section. I usually use a hot glue gun to hold things down but I was afraid that I would destroy the foam removing it after the rough carving was finished. |
|
|
||
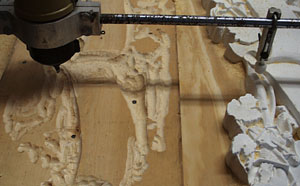 |
Here is a closeup view of the actual process as it happens. You start off with a fairly large bit and tracer to remove large chunks of material and then gradually reduce the sizes until you feel like you have enough information transferred to begin carving by hand. | |
 |
PU | 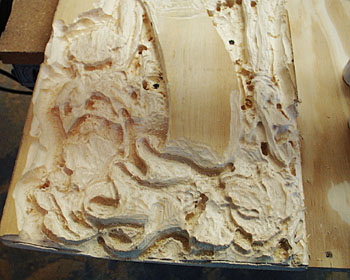 The wood looks a little rough as you can see above but the entire process took only a couple of hours and the blank is now ready to be finished. The foam has definitely proven itself to me! |